
Por ahora, el tutorial de Piero de ha sido todo lo que esperaba, más una serie de cosas que no tenía idea que se podían hacer, en Blender ni en ningún otro software. Ni siquiera voy por 1/4 del curso. El proceso de crear este ave, revela una serie de herramientas en el camino, que sirven para la creación de cualquier cosa, no solo pájaros rojos. Puedo ahora, con mayor certeza decir qué es Piero, pero falta ver qué me espera.
La última vez que reporté acerca de este tutorial, estaba por la fase de esculpir la base del modelo, la cual fue la cosa más natural y el acercamiento más manual imaginable para crear un modelo 3D con una herramienta digital. Como masilla, pero sin embarrarte y sin ocupar un espacio enorme en tu casa.
Luego vino la fase de retopology, la cual, solía hacerse desde el principio del modelo, ahora se construye sobre la escultura hecha, cual masilla digital. La retopología sirve para una serie de propósitos: 1. Economizar la cantidad de polígonos, 2. Ubicar esos pocos polígonos bien y 3. Facilitar el UV mapping.
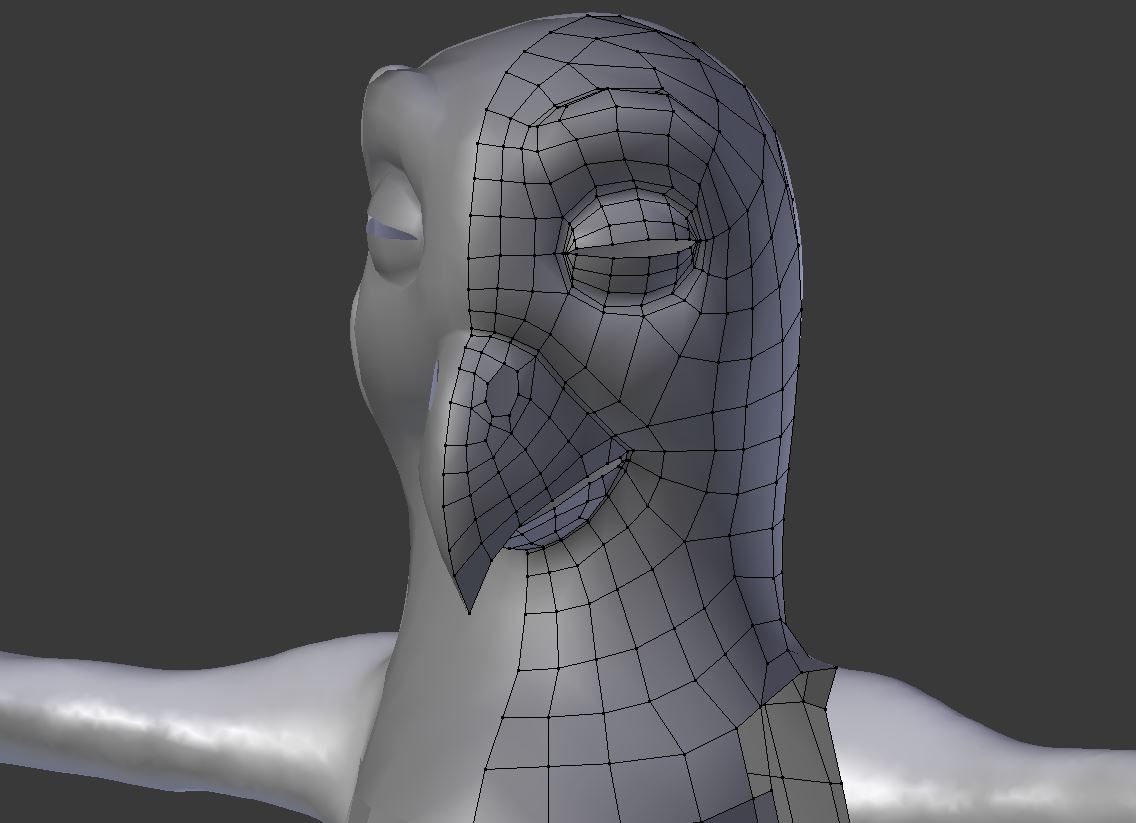
Retopologia de la cabeza
1. Un modelo de altísima resolución no se anima bien, porque solo mostrarlo pesa demasiado. Mostrarlo en pantalla, animarlo y darle render, todo es más lento. Imagina tener que esperar 1 segundo más cada vez que cambias de cuadro, cuando quieres ver una acción en tu modelo, la cual involucra 24 cuadros. No logras visualizar la acción. La gracia es poder ver el movimiento y la deformación de tu personaje de una manera entendible y que no te tome el día, para que el render pueda encargarse de una versión de mayor peso.
2. Si bien, una versión de menor conteo de polígonos es más económica en términos digitales, tampoco permite tanto detalle, por lo tanto, hay que ser un poco más generoso en cuanto a conteo de polígonos en partes donde lo amerita. En este caso las coyunturas y las facciones de la cara necesitaban ser más cuidadoso con los polígonos: conteo, la dirección en la que van los bordes de estos polígonos y cómo se conectan uno con otro.
3. Haber optimizado esto, permite que estirar estos polígonos en una superficie plana, como quien pela una naranja para pintar su cáscara.
Una vez optimizada la topología del modelo, Kent Trammell decide crear los modelos y donde irían las plumas de las alas y generar un sistema de numeración y organización dentro de los layers, para facilitar su multiplicación y poder visualizarse en la fase del rigging.
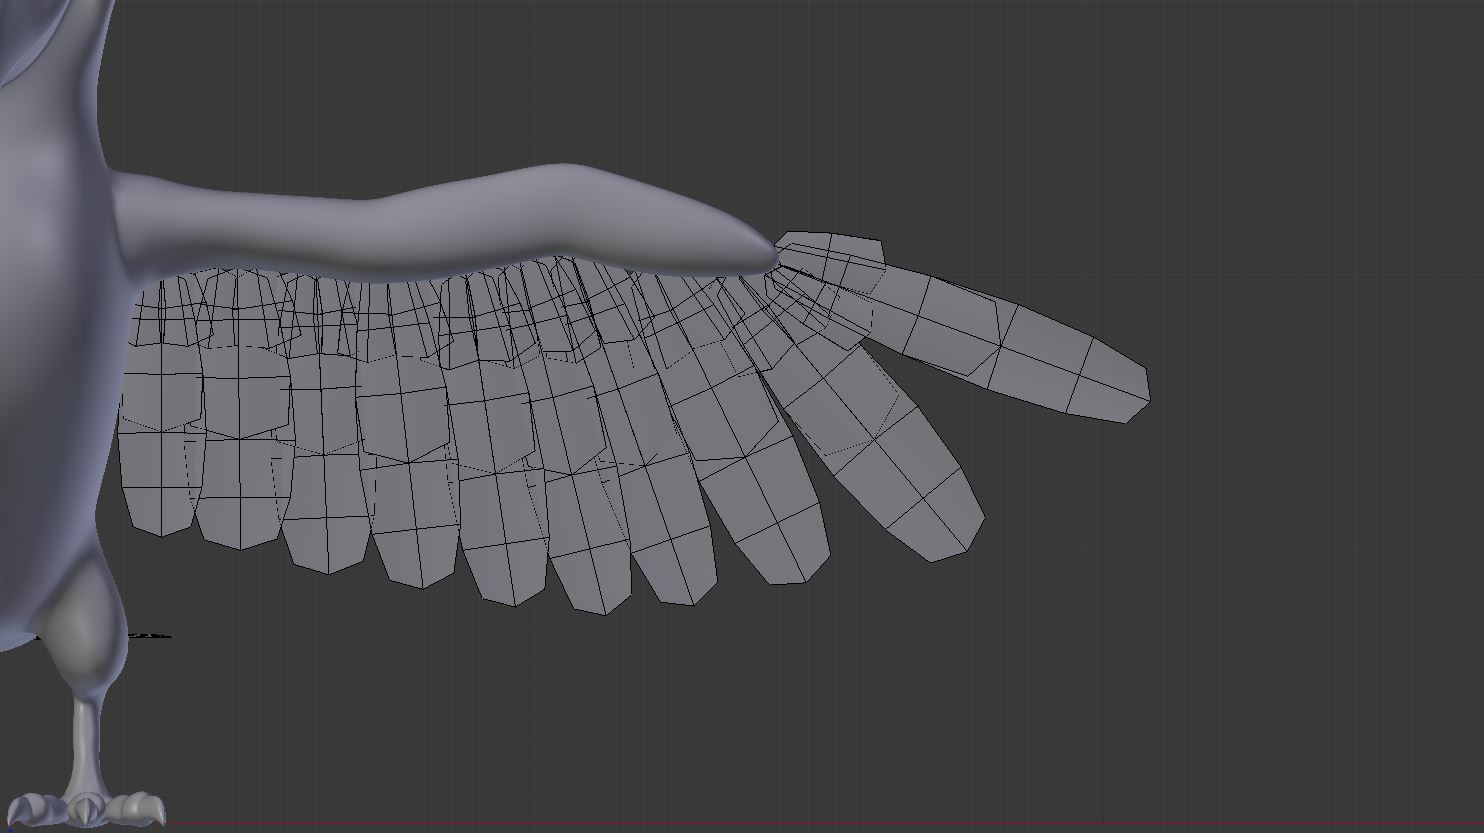
Plumas de las alas
Antes de empezar a pintar, toma el modelo y le hace una serie de blendshapes, con herramientas y trucos que permiten cosas como modificar un lado de la cara y copiarlo hacia el otro lado, de manera que solo tienes que hacer el cierre del párpado la sonrisa de un solo lado, y copiarla hacia el otro. Otra herramienta es el uso de los vertex groups, que de ser asignados a un blendshape, el blendshape solo afecta a esos vértices, como un molde, la expresión no invade lo que no quieres que sea invadido. Por último, el poder mezclar dos blendshapes y volverlos uno solo, permite que se pueda tratar cada mueca por partes, duplicar cada una y trabajar más limpiamente.
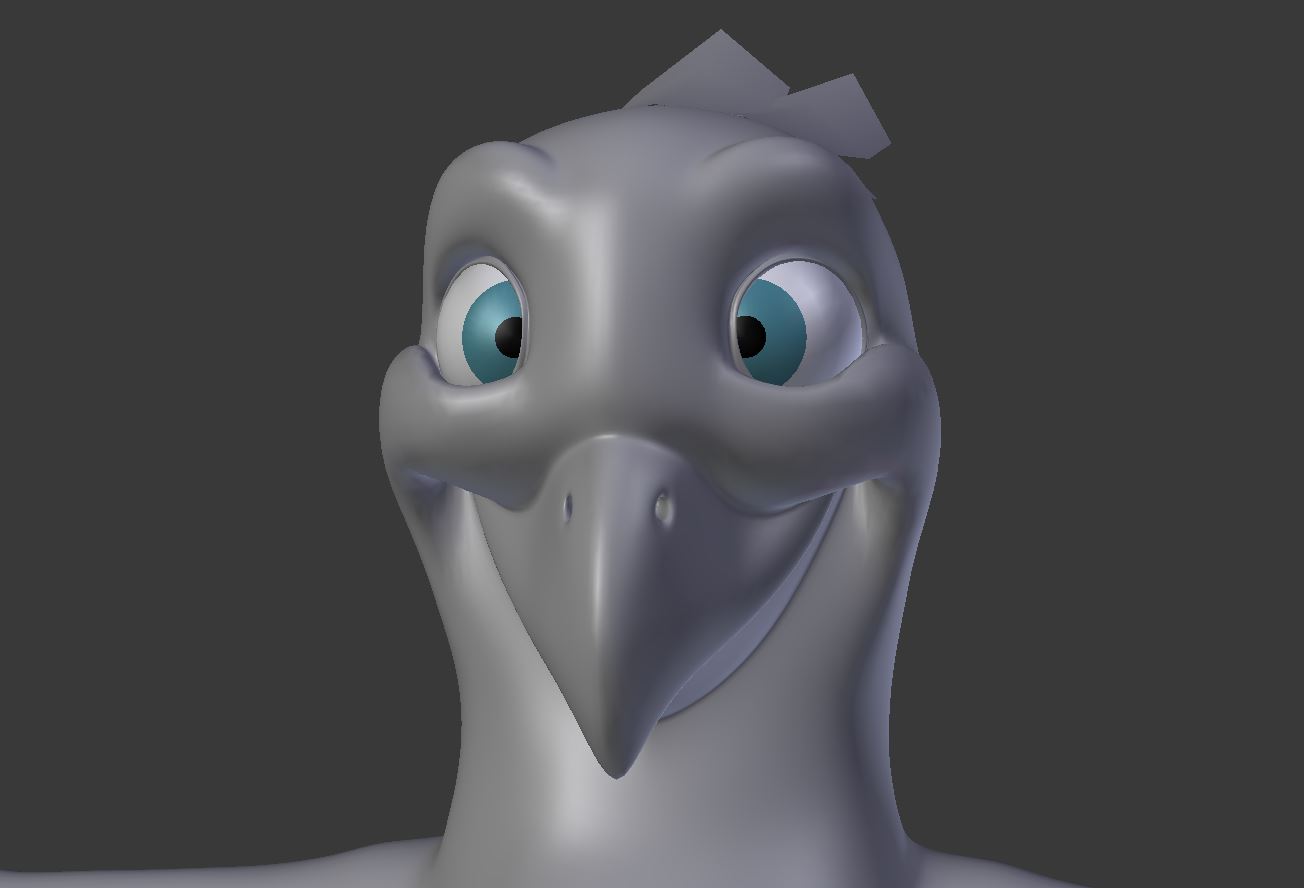
Piero Sonriente
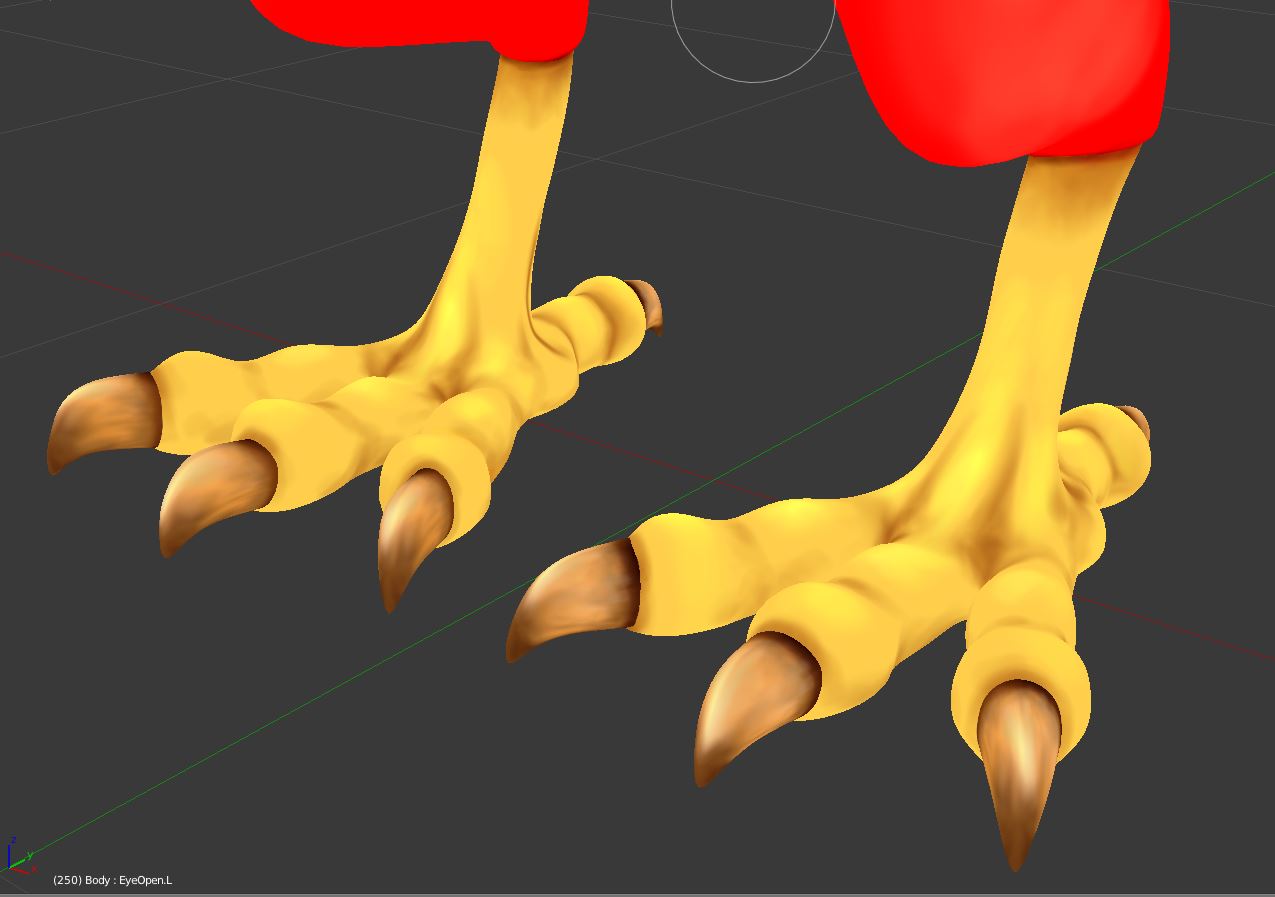
Luego viene la parte del UV unwrap, la cual brinda herramientas fabulosas para hacer este proceso, normalmente tedioso, casi divertido. Uno de los trucos es tomar cada objeto repetitivo y ubicarlo en el mismo lugar, para solo tener que pintarlo una vez. Esto se hizo para las patas y las uñas.
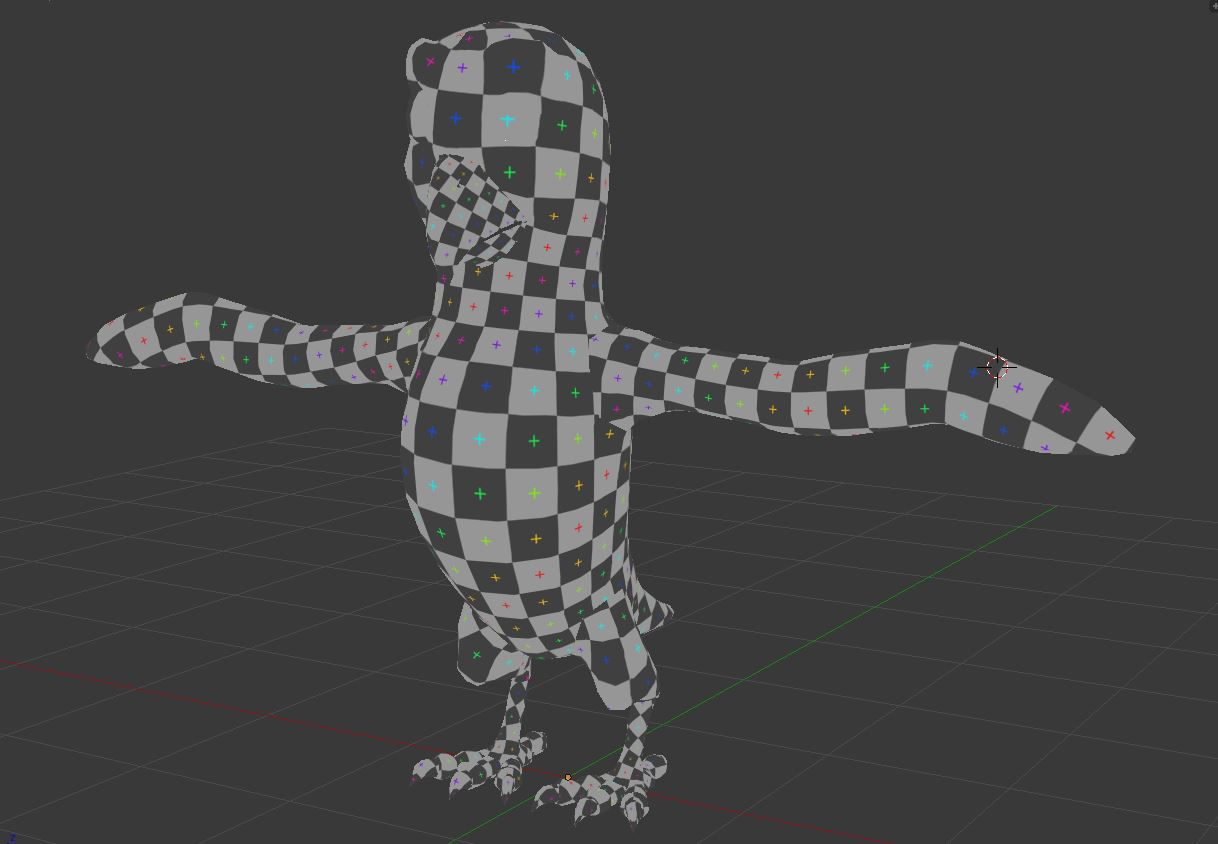
Prueba de densidad de UV map
Una vez estirada la piel sobre esta superficie bidimensional llamada UV map, uno puede escoger pintarlo en tu programa de edición de imagen favorito, o en vivo, directamente sobre el modelo. Y así fue. Es decir, se pintó de las dos maneras. Por qué? Primero: porque se puede y segundo: porque pintar sobre 3D, te aseguras que lo que estás pintando, es donde quieres, y sobre la superficie 2D puedes pintar detalles en esquinas que puede no ser tan fácil alcanzarlas, porque algo las cubre, como ejemplo, entre los dedos de los pies. El haber hecho las expresiones de ojo abierto y ojo cerrado, antes de pintar, permite poder pintar el ojo cerrado y abierto y asegurarse que lo que estás pintando, se va a ver bien de las dos maneras.
Como dije anteriormente, estoy a penas empezando. La fase de rigging para cualquier modelo, especialmente para un ave, es sumamente larga. Es una lástima, que la fase de rigging sea tan técnica y tan difícil de visualizar, porque es la fase que hace que el personaje transmita vida a la pantalla en la fase de animación. Pero ya llegará ese momento para relatar sobre esa fase. Inténtalo tú también: http://cgcookie.com/blender/cgc-courses/piero/
—
For now, the tutorial has been everything I expected, plus a number of things I had no idea you could do, in Blender or any other software. I’m not even as far as one quarter of the course. The process of creating this bird, revealing a series of tools along the way, they serve to create anything, not just red birds. I can say with more certainty what Piero is, but we’ll see that’s in store for me.
The last time I reported about this tutorial, I was at the phase of sculpting the model, which was the most natural thing and the most manual approach imaginable for creating a 3D model with a digital tool. With clay, but without worrying to get all smeared in mud and without occupying a huge space in your home.
Then came the phase Retopology, which used to happen at the same time as the creation of the model, which now occurs over the digital clay base. The retopology serves a number of purposes: 1. Economize the number of polygons, 2 . Locate those few polygons well and 3. Ease the UV mapping.
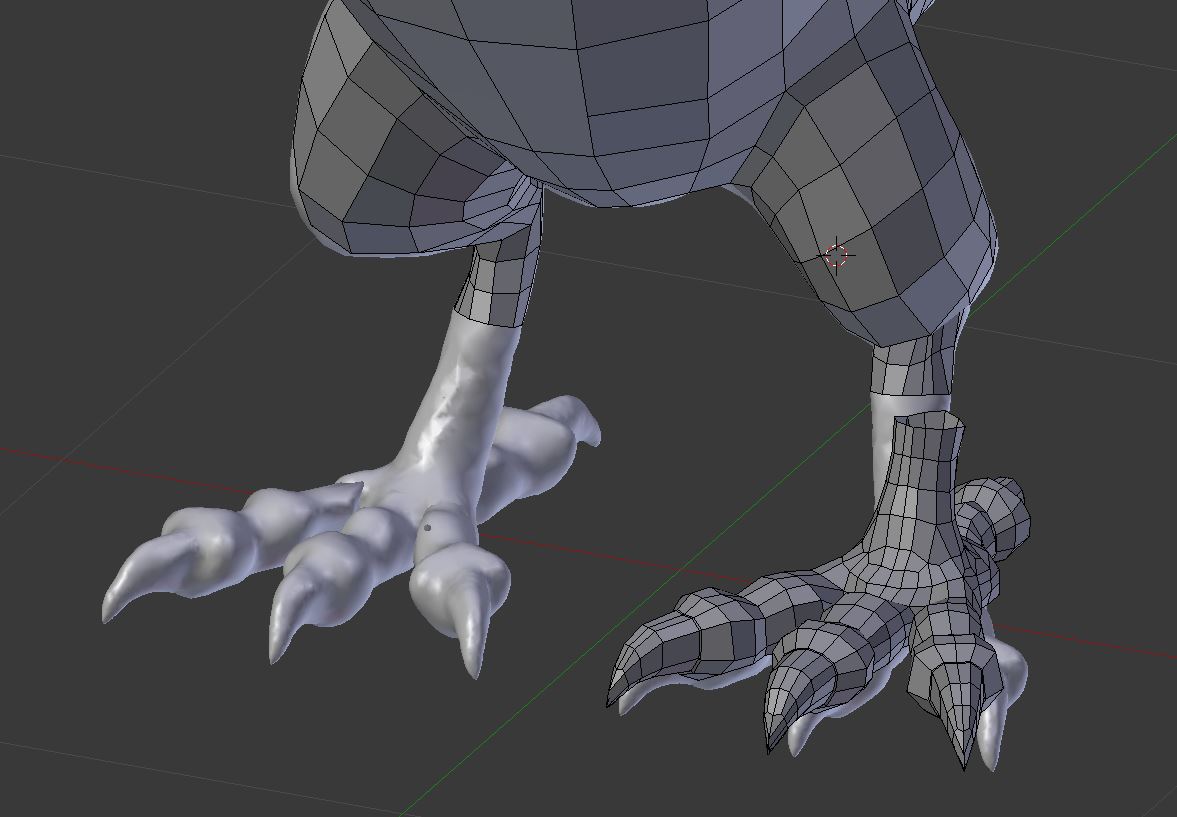
Retopology of the legs
1. A high resolution model cannot be animated easily , because only displaying it is very heavy on your computer. Displaying, animating and rendering, everything is slower. Imagine having to wait 1 second each time you change a frame, when you see an action in your model , which involves 24 frames. You don’t get to visualize the action. The idea is to be able to see the movement and deformation of your character in an understandable way and not take the whole day in the process, so that the render can handle a heavier version.
2. While a smaller version polygon count is cheaper in computer terms, it does not allow much detail, so you have to be a little more generous in terms of polygon count in parts where it’s needed. In this case the joints and facial features, yo need to be more careful with polygons, in terms of: poly count, the direction in which they the polygon edges go and how they connect to each other.
3. Having optimized this allows us to stretch these flat polygons on a surface, as if peeling an orange to paint the peel.
Once the topology of the model was optimized, Kent Trammell decided to create the model of the wing feathers and create a numbering system and organization within the layers, for easy multiplication and visualization when we get to the rigging phase.
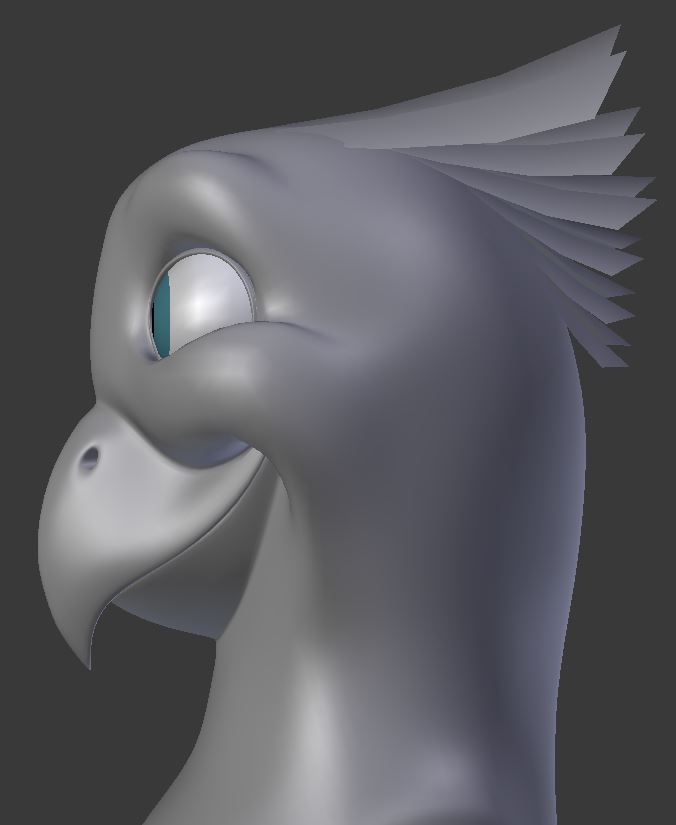
Feathers of the head
Before he starts painting, he takes the model and makes a series of blendshapes, tools and tricks that allow things like modifying one side of the face and copying it to the other side, so you just have to make the eyelid closure smile one hand, and copy to the other. Another tool is the use of vertex groups, which if assigned to a blendshape, the blendshape vertices only affects those inside, like a mask, the expression does not invade what you don’t want to be invaded. Finally, the hability to mix two blendshapes and make them one, allowing each face be treated piece by piece, duplicate each one, and work more cleanly.
Then comes the phase of the UV unwrapping, which provides wonderful tools to make this process, which is usually tedius, seem almost fun. One of the tricks is to take each object repetitive and put it in the same place, so you only have to paint it once. This was done to the feet and nails.
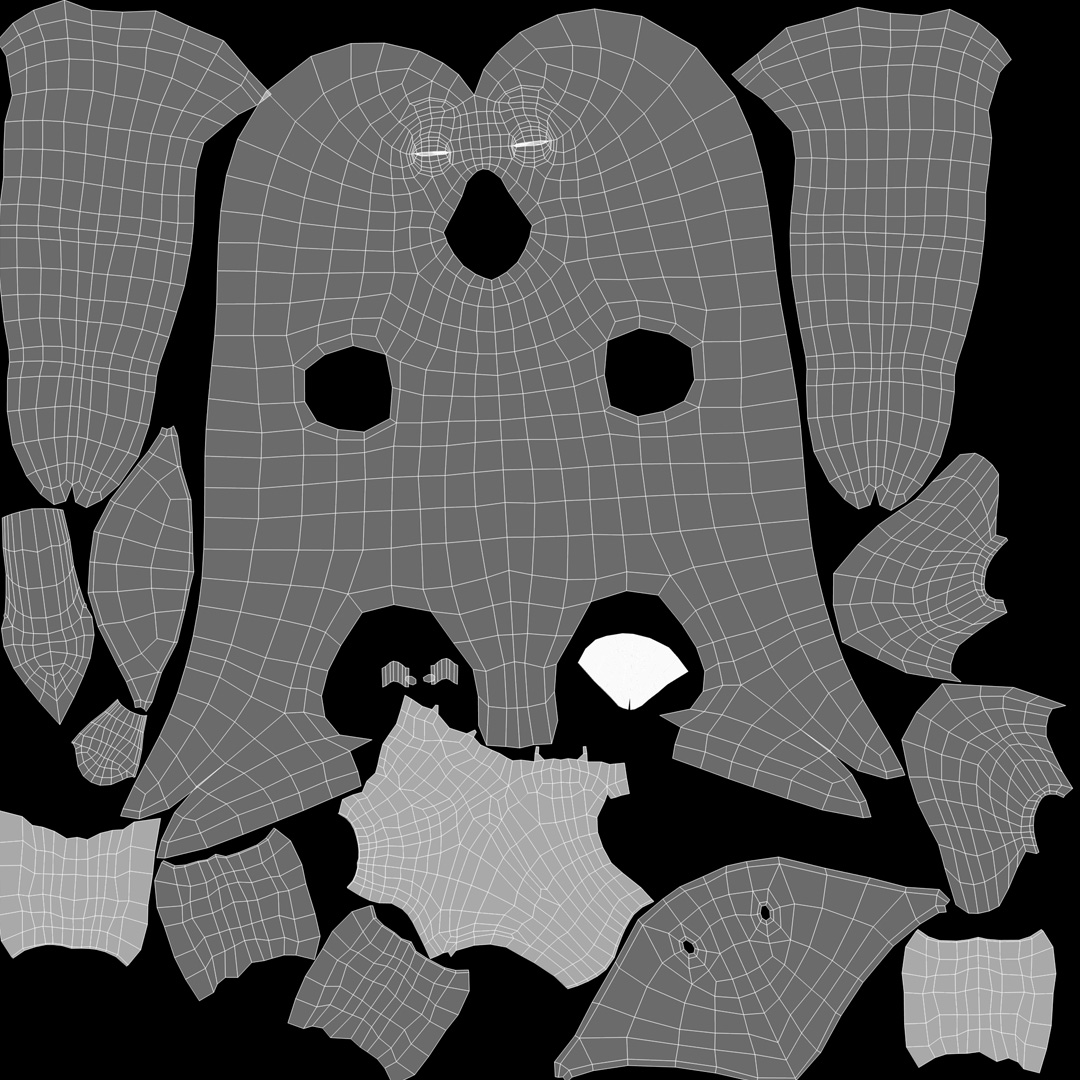
Plain UV map
Once stretched the skin over this two-dimensional surface called UV map, one can choose to paint in your favorite image editing app, or live, directly on the model. And so it was. That is, painting both ways. Why? First: because you can and second: because when painting on 3D, you make sure that what you are painting, is where you want you want to paint, and in the 2D surface, you can paint corner details may not be as easy to reach, because something covers them, between the toes, for example. The expressions made of the open eye and closed eye, helps painting the eye closed then opening it and making sure that what you are painting, you will see it right, both ways.
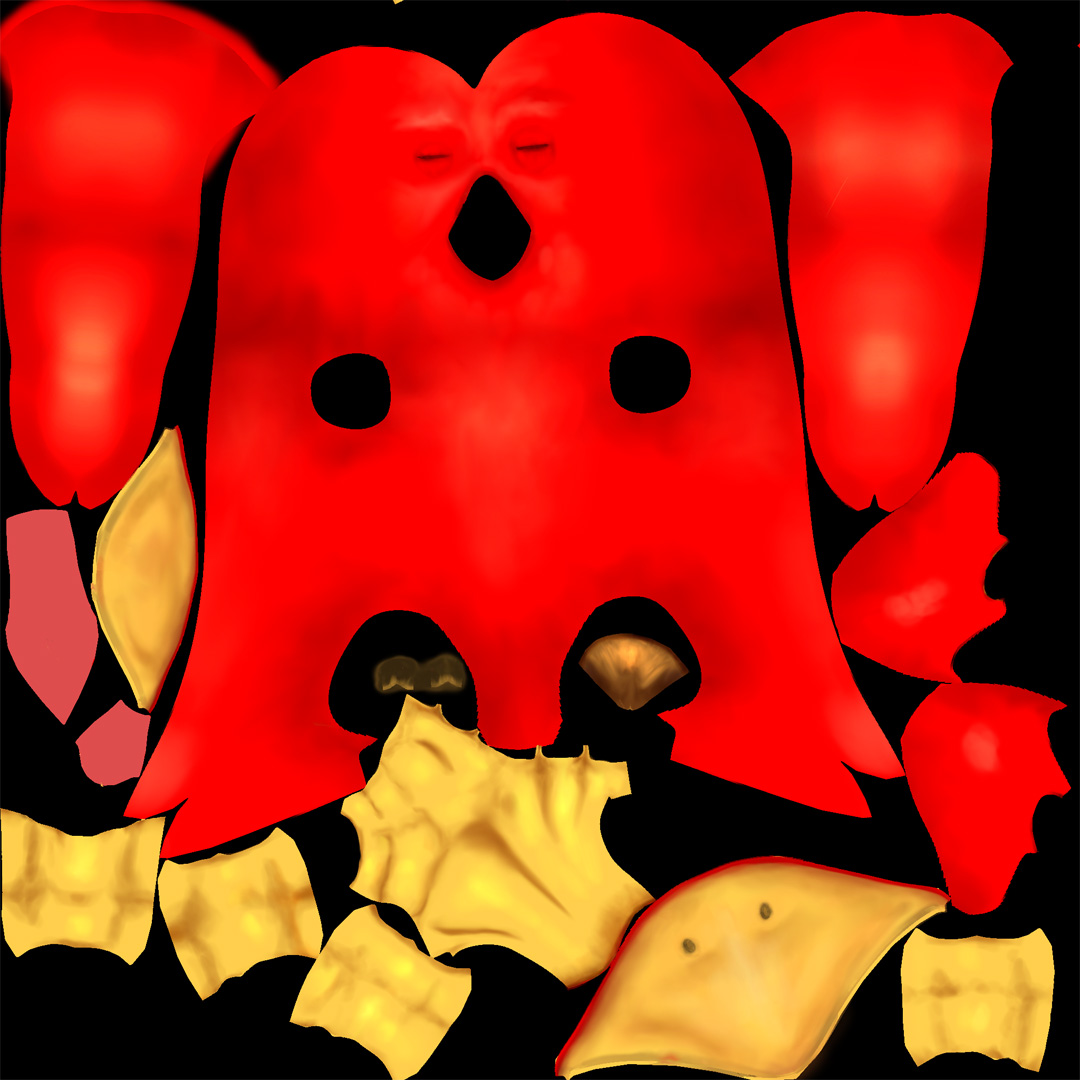
Painted UV map
As I said earlier, I’m barely starting. Rigging phase for any model, especially for a bird, is extremely long. It’s a shame, that the rigging is so technical and difficult to visualize, because it is the phase that makes the character convey life on the screen in animation. But the time will come to talk about that phase. Try it: http://cgcookie.com/blender/cgc-courses/piero/
Tags: 2D, 3D, 3D Painting, anatomy, animacion, animation, blender, Blender 3D, blendercookie, blendshapes, bump map, layers, lowpoly, Piero, polygons, retopology, rigging, sculpting, skin, tutorial, UV mapping, UV unwrap, verticesComment
Lo que hay en Blender Guru gratis, es muy útil, los tutoriales son sumamente claros y Andrew Price participa mucho online y está abierto a preguntas. El Architecture Academy de Andrew Price si tiene un precio mayor, pero creo que lo vale, considerando todo lo que incluye. No lo descartes.
También busca Blendernerd, Blendertuts y Blendernation. También sigue el canal de Youtube de BlenderFoundation, BornCG y CG Geek.
Espero te sirvan.


Me gusta tu blog, y este curso tiene muuuuy buena pinta y es muy asequible… ayer estaba echandole un ojo a Blender Guru y los precios son absurdos… pero con este y tu opinion… me parece que Piero va a tener otro fan…