
This is a brief![]() explanation of how to get started
explanation of how to get started![]() on set design with thumbnails.
on set design with thumbnails.
I hear you. You want![]() to be able to pull a landscape out of your head, but your knowledge (or lack of knowledge) stops you from bothering, so whenever you want
to be able to pull a landscape out of your head, but your knowledge (or lack of knowledge) stops you from bothering, so whenever you want![]() to freely doodle a landscape, you end up making a character in your sketchpad instead, and when you seriously want
to freely doodle a landscape, you end up making a character in your sketchpad instead, and when you seriously want![]() to go to the software, you don’t know where to start
to go to the software, you don’t know where to start![]() . Here’s an exercise that takes you from that stage of doubt to a place where you can get confident enough to keep on developing
. Here’s an exercise that takes you from that stage of doubt to a place where you can get confident enough to keep on developing![]() your concept sketches, and even come up with a layout. Once again, the keyword is: “thumbnails”.
your concept sketches, and even come up with a layout. Once again, the keyword is: “thumbnails”.
Step 1: in one sheet of paper, make a grid. Start![]() by splitting the sheet in half, horizontally and vertically, then do the same thing to each half and subdivide until your paper looks like a grid that each box is the size of, you guessed it, a thumb. Put your thumb on its widest length and measure it like that. You do not have to be precise. Each box represents a potential shot. Be as loose as you can, this is why I say paper and not “your favorite painting software
by splitting the sheet in half, horizontally and vertically, then do the same thing to each half and subdivide until your paper looks like a grid that each box is the size of, you guessed it, a thumb. Put your thumb on its widest length and measure it like that. You do not have to be precise. Each box represents a potential shot. Be as loose as you can, this is why I say paper and not “your favorite painting software![]() ” yet. You can, but be loose first, the idea is that you can do this anywhere: at the airport, at the park, at your favorite couch or by the beach/river/lake, right before taking a plunge.
” yet. You can, but be loose first, the idea is that you can do this anywhere: at the airport, at the park, at your favorite couch or by the beach/river/lake, right before taking a plunge.
Before step 2. Have you seen this before?
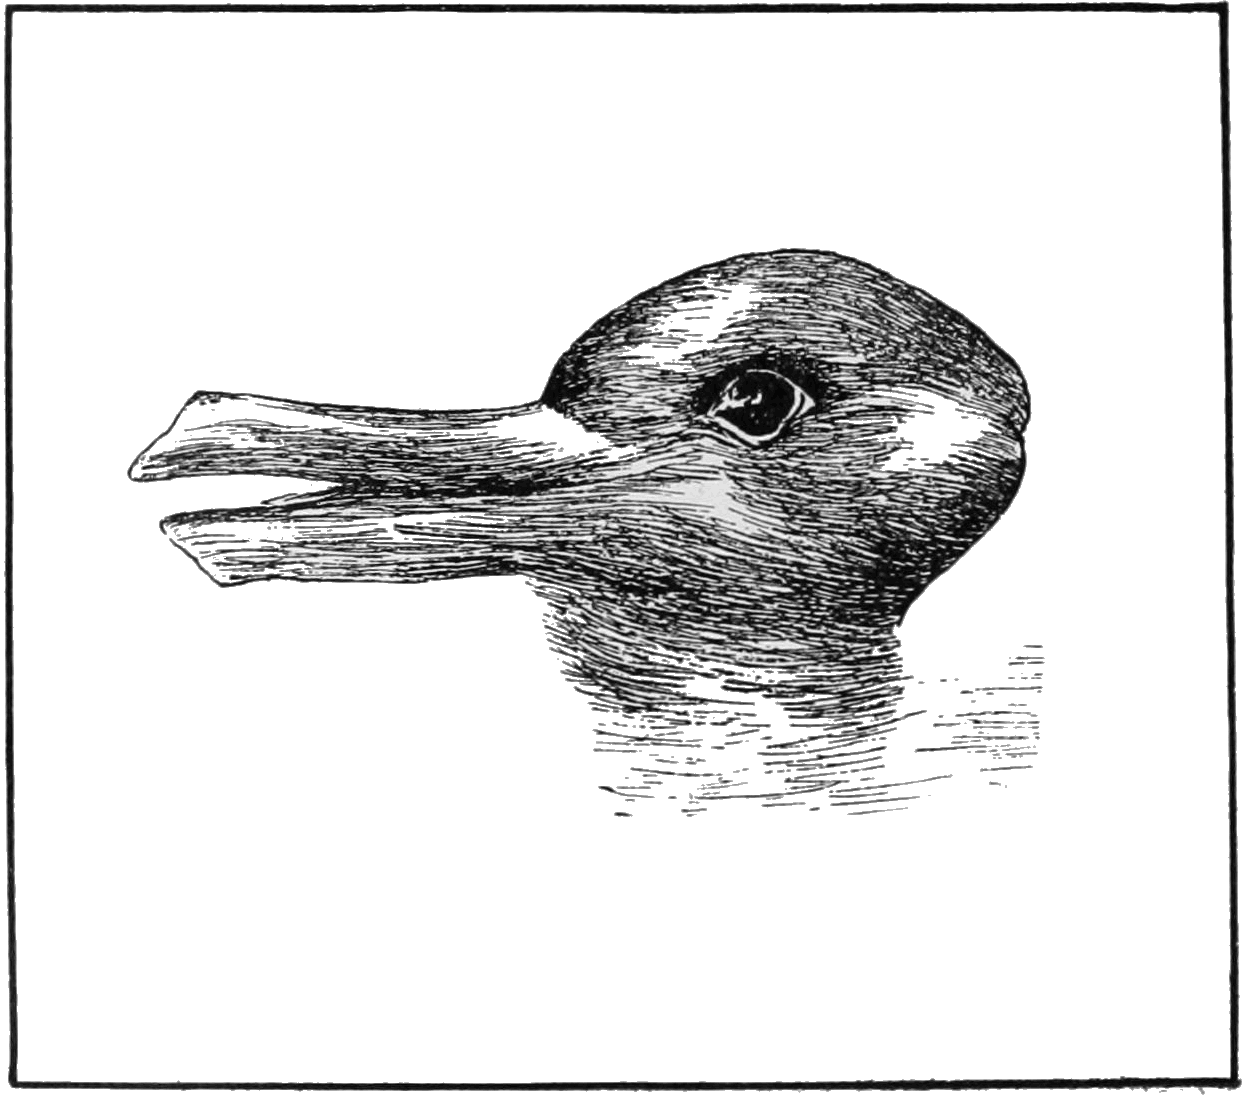
What do you see?
If you saw a rabbit, you’re right-brained, if you saw a duck, you’re left-brained. I’m lying. If you saw either, you’re human. This capability of seeing one object or another, is called perceptual shift. The same thing happens with color, remember the black![]() and blue (excuse me, white and gold
and blue (excuse me, white and gold![]() ) dress? You, as any other human, can see a drawing and find something in it, by marks found in the shape. The two sticks can act as ears, or as a beak, but you cannot see both rabbit and duck at the same time, all you can achieve with your mind is saying: “It’s neither a duck or a rabbit, it’s an image
) dress? You, as any other human, can see a drawing and find something in it, by marks found in the shape. The two sticks can act as ears, or as a beak, but you cannot see both rabbit and duck at the same time, all you can achieve with your mind is saying: “It’s neither a duck or a rabbit, it’s an image![]() and it is what it is”. You can also come with something else entirely. This happens also when looking at clouds, or a grainy wall, a mountain or the texture of wood. You can also generate
and it is what it is”. You can also come with something else entirely. This happens also when looking at clouds, or a grainy wall, a mountain or the texture of wood. You can also generate![]() this, by scribbling.
this, by scribbling.
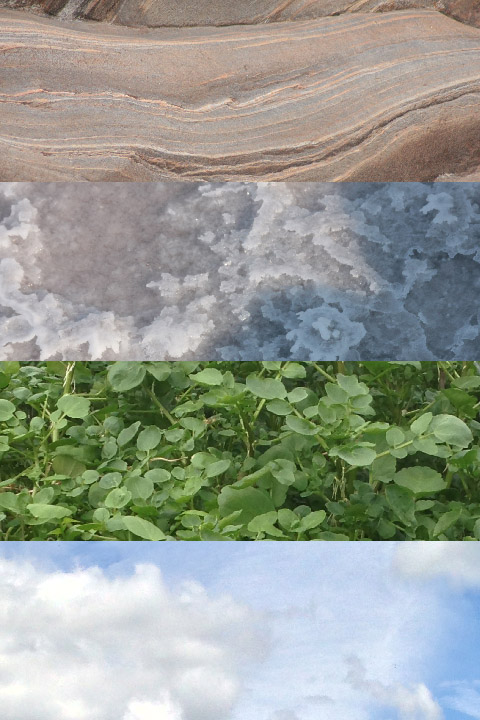
What do you see?
Step 2: Scribble. Make a search and look for the word: scribble. This is what I mean by “scribble”. Ignore Morgan Freeman, John Lennon and Mr. Bean, those are not scribbles. Scribble very loosely. If you’re right handed, use your left hand, don’t think about what you’re doing, just scribble. I know it might sound like I’m about to indoctrinate you on making modern art, but no, trust me. Your lines shouldn’t resemble anything or anyone just yet, you do have to make sure your lines pass![]() by all boxes. Don’t overdo it. Two to six squiggly lines passing
by all boxes. Don’t overdo it. Two to six squiggly lines passing![]() by each box is more than enough.
by each box is more than enough.
Step 3: Now look at the one box that calls your attention first and do the same thing you do when looking at clouds: “this looks like a frog”, “that one looks like a ninja”, “those look like two horses”, but think landscape, think interior, think structure. Those scribbles, because of their position![]() , their angle and their shape,can become many different things.
, their angle and their shape,can become many different things.
Look at those awful, awful grid lines. Scribble, observe, then use what you have in your little boxes.
You might think this is cheating. But is it really cheating? You made the lines yourself, you saw the images![]() , so they were always in you, you just set them free.
, so they were always in you, you just set them free.
These objects came to my mind on this attempt:
-clouds: cumulonimbus, cirrus, stratus, nimbostratus, altocumulus, cirrocumulus, and my favorite: fog. Know these names and shapes.
-terrain: rock, land, mud, sand, mountain ranges, hills, cliffs, plateaus, boulders, rock formations![]() , caves, dunes, tunnels, stalactites, stalagmites, columns. Look for these names in your search engine
, caves, dunes, tunnels, stalactites, stalagmites, columns. Look for these names in your search engine![]() , know what they are, look for more terrain terms
, know what they are, look for more terrain terms![]() .
.
-Foliage: forests, jungle, rain forest, pine trees, oak trees, shrubs, grass, moss, vine, willow trees, olive trees, baobabs, palm trees, stone pines (I drew a lot of them), roots.
-manmade: towns at a distance, buildings, house roofs, bridges, castles, towers, lamp posts, paths, streets, walls, ruins, camp sites.
-Vehicules: ships, cars, trains![]() , blimps, planes, mechwarriors, spaceships, At-At walkers.
, blimps, planes, mechwarriors, spaceships, At-At walkers.
-objects that are very close to the camera
–People characters, creatures, monsters, crowds, armies. Characters are useful to have for proportions.
-natural phenomenon: a thunderstorm, a sandstorm, an avalanche, a forest fire, an aurora borealis, a volcano eruption, again: fog, haze.
-unnatural phenomenon: smoke, trash, city lights, death stars
-the moon, the sun, planets, an asteroid field, Saturn rings, a nebula
Tips:
*The horizon line does not have to be horizontal. Remember you’re supposedly looking at this environment through a camera lens, so the horizon line could be even out of frame. You should be conscious of its existence, though.
*Not all the scribbles have to be something, you can use a part of it and decide not to use the rest. Don’t even waste time erasing, just work on what is useful to you.
*Flip the page and look again. Rotate, look again. You can do vertical compositions, that you can use for a camera tilt. What you randomly made with your pen, might not inspire you to use it from this angle, but it might be a cool mountain range if you put it upside down, or a steep cliff if you rotate 90 degrees.
*your drawing skills![]() and your knowledge on perspective come in later, maybe on a part 3 of this tutorial, who knows? First, look for that environment that revealed something cool to you. This technique, while it will always show your knowledge on perspective, you won’t need to go and make vanishing points and perspective lines every time if you don’t want
and your knowledge on perspective come in later, maybe on a part 3 of this tutorial, who knows? First, look for that environment that revealed something cool to you. This technique, while it will always show your knowledge on perspective, you won’t need to go and make vanishing points and perspective lines every time if you don’t want![]() /need to.
/need to.
*They don’t have to be accurately real![]() , you’re creating something new to get in a ballpark, something to get started on. They only have to be believable.
, you’re creating something new to get in a ballpark, something to get started on. They only have to be believable.
*Start using images of things you have, not only scribbles, you might find some interesting uses for household items and found objects. Warning: don’t start hoarding. Better strategy: just photograph the object.
Things that you’ll discover about yourself and your abilities:
-that even though you’re not using any visual reference at the beginning, you’ll realize that your brain does capture more things that you think, and that your visual library is actually more vast than you think. That being said, don’t ever stop collecting your reference images![]() with your camera or your search engine
with your camera or your search engine![]() , or Pinterest. Watch out for Pinterest, it can be addictive.
, or Pinterest. Watch out for Pinterest, it can be addictive.
-The next few days you’ll become more observant of your environment, of lighting, of color, of composition, of what happens to that tree you like at a certain time of the day. You’ll see useful shapes everywhere: moss in trees, the debris in a construction site, spilled paint, the shape the vinaigrette left in your lunch, anywhere. You’ll finally find a Pollock useful. You’ll record things differently with your brain, and hopefully will try them out.
-The movies![]() , games and stories that you say you like, are different from the ones that impact you. For example, when I first tried this, I realized that whenever I didn’t know how to complete a line between two cliffs, and decided to draw a bridge, and my first option
, games and stories that you say you like, are different from the ones that impact you. For example, when I first tried this, I realized that whenever I didn’t know how to complete a line between two cliffs, and decided to draw a bridge, and my first option![]() was always a suspension bridge like Indiana Jones and the Temple of Doom. Not my favorite of the three, but still better than the Kingdom of Monkeys and Shia La Boeuf. My point is, you’ll force yourself to pull things from the top of your mind and not so much from the top, and you’ll realize what things you have on top of mind immediately. I went for a lot of mountain scapes, a lot of deserts and rock formations
was always a suspension bridge like Indiana Jones and the Temple of Doom. Not my favorite of the three, but still better than the Kingdom of Monkeys and Shia La Boeuf. My point is, you’ll force yourself to pull things from the top of your mind and not so much from the top, and you’ll realize what things you have on top of mind immediately. I went for a lot of mountain scapes, a lot of deserts and rock formations![]() , but for someone who went scuba diving yesterday, all they could have on top of mind is coral formations, not the scenery in that Tarantino movie he claims is his favorite.
, but for someone who went scuba diving yesterday, all they could have on top of mind is coral formations, not the scenery in that Tarantino movie he claims is his favorite.
-At the very moment you draw the elements, you might not know exactly where you’re taking them from, but it doesn’t matter until you start![]() the reference phase, others will be obvious. For me, some of them were from movies, games and books and some were from places I have been to, or photographs I’ve seen maybe just once. There were several mountain ranges from Skyrim, Harrenhal from Game of Thrones, Dracula’s castle, from Castlevania, not from Romania, Pride Rock from The Lion King, Mordor from Lord of the Rings, the mountains of Peru from The Emperor’s New Groove, the REAL mountains of Peru, El Valle de Antón, the underwater caves in the peninsula of Yucatán in Mexico, Iceland mountain scapes, The rocky part of Isla Iguana, the Grand Canyon, the gorges of Petra, those plains in Coclé that have a Corotú every now and then, Huangshan in China, Taormina in Sicily, Bambito and I haven’t been to most of those places, most of the time it’s a documentary or an image I saw on the web, most of the time it’s not even real, like a scene in a videogame. This is what concept artists call a “Visual Library”. It’s this library inside your head of what something should look like: animals, objects, places, anything figurative. You will nurture and shape it as you practice this.
the reference phase, others will be obvious. For me, some of them were from movies, games and books and some were from places I have been to, or photographs I’ve seen maybe just once. There were several mountain ranges from Skyrim, Harrenhal from Game of Thrones, Dracula’s castle, from Castlevania, not from Romania, Pride Rock from The Lion King, Mordor from Lord of the Rings, the mountains of Peru from The Emperor’s New Groove, the REAL mountains of Peru, El Valle de Antón, the underwater caves in the peninsula of Yucatán in Mexico, Iceland mountain scapes, The rocky part of Isla Iguana, the Grand Canyon, the gorges of Petra, those plains in Coclé that have a Corotú every now and then, Huangshan in China, Taormina in Sicily, Bambito and I haven’t been to most of those places, most of the time it’s a documentary or an image I saw on the web, most of the time it’s not even real, like a scene in a videogame. This is what concept artists call a “Visual Library”. It’s this library inside your head of what something should look like: animals, objects, places, anything figurative. You will nurture and shape it as you practice this.
-You’ll finally find a constructive use for Pinterest. Don’t go crazy on it, just find what you like and when you start![]() looking for reference, you already know, because you drew it, so it kind of came from somewhere.
looking for reference, you already know, because you drew it, so it kind of came from somewhere.
-You’ll finally find something to do with this.

A Sweet potato ready to turn into a She-Ra landscape element.
Afterwards, you’ll add some color, and THEN, will look for reference. Please do this in this order, otherwise, you’ll be spending a lifetime searching for images![]() you’ll never use.
you’ll never use.
Next, I’ll show you how to quickly color your shot in a way you don’t spend ages looking for the perfect color palette. Here’s a clue: it’s the same process.
I leave you for now, with this quote :
“I saw the angel in the marble and carved until I set him free.” -Michelangelo Buonarroti
/
Te entiendo. ¿Quieres ser capaz de sacar un paisaje de tu cabeza, pero tu conocimiento (o la falta del mismo) te detenga de siquiera tratar, así que cada vez que deseas garabatear libremente un paisaje, terminas haciendo un personaje en tu cuaderno, y cuando quieres ir al software, no sabes por dónde empezar. He aquí un ejercicio que te lleva desde esa etapa de la duda a un lugar donde puedes obtener la suficiente confianza para seguir desarrollando tus bocetos conceptuales, e incluso llegar a un diseño. Una vez más, la palabra clave es: “miniaturas”.
Paso 1: en una hoja de papel, haces una cuadrícula. Comienza por la división de la hoja por la mitad, horizontal y verticalmente, y luego haces lo mismo a cada mitad y subdivides hasta que tu papel se ve como una cuadrícula que cada cuadro es el tamaño de un pulgar. Pon tu pulgar en la longitud más amplia de uno de los cuadros y mide así. No tienes que ser preciso. Cada cuadro representa una toma en potencia. Dibuja tan suelto como sea posible, es por eso que digo “papel” y no “tu software de pintura favorita” todavía. Puedes usar software, ten soltura primero, la idea es que puedes hacer esto en cualquier lugar: en el aeropuerto, en el parque, en tu sofá favorito o en la playa/río/lago, justo antes de una zambullida.
Antes del paso 2: Has visto esto antes?

Qué ves?
Si viste a una mujer joven, eres orientado al lado derecho del cerebro, si viste una anciana, que eres orientado del lado izquierdo del cerebro. Mentira. Si viste cualquiera de las dos, eres humano. Esta capacidad de ver un objeto u otra, se llama desplazamiento de la percepción. Lo mismo ocurre con el color, recuerdas el vestido negro y el azul (perdón, blanco y dorado)? Tú, como cualquier otro ser humano, puedes ver un dibujo y encontrar algo en él, por las marcas que se encuentran en la forma. La línea abajo puede actuar como la boca de la anciana, o como el collar de la joven, pero no se puede ver la joven y la anciana al mismo tiempo, todo lo que puedes lograr con tu mente es decir: “No es ni una joven o un anciana, es una imagen y es lo que es”. También puedes inventar algo completamente distinto. Esto sucede también cuando se mira a las nubes, o una pared granulada, una montaña o la textura de la madera. También se puede generar el efecto, haciendo garabatos.
Qué ves?
Paso 2: Haz un garabato. Haz una búsqueda y busca la palabra: Garabato. Esto es lo que quiero decir con “garabato”. Garabatea de manera muy informal. Si eres diestro, usa tu mano izquierda, no pienses en lo que estás haciendo, simplemente garabatea. Sé que puede sonar como que estoy a punto de adoctrinar en hacer arte moderno, pero no, confía en mí. Tus líneas no deben parecerse a nada ni a nadie por el momento, tienes que asegurarte de que tus líneas pasen por todos los cuadros. No te excedas. De dos a seis líneas onduladas que pasan por cada cuadro es más que suficiente.
Paso 3: Ahora mira el cuadro que llama tu atención primero y haz lo mismo que haces cuando miras a las nubes: “esta parece una rana”, “esta parece un ninja”, “estas parecen dos caballos”, pero piensa en paisaje, piensa en interior, piensa en estructuras. Esos garabatos, debido a su posición, su ángulo y su forma, pueden llegar a ser lo que quieras.
Garabatea, observa, y usa lo que tienes en tu cuadros.
Podrías pensar que esto es hacer trampa. Pero ¿estás realmente haciendo trampa? Tú hiciste las lineas, tu visualizaste los paisajes, así que siempre estuvieron en tí, tú solo las liberaste.
Estos objetos vinieron a mi mente en este intento:
-nubes: cumulonimbos, cirros, estratos, nimbostratos, altocúmulos, cirrocúmulos, y mi favorito: niebla. Conoce estos nombres y formas.
-terreno: roca, tierra, barro, arena, montañas, colinas, acantilados, mesetas, rocas, formaciones rocosas, cuevas, dunas, túneles, estalactitas, estalagmitas, columnas. Puedes buscar estos nombres en tu buscador, saber lo que son. Busca más términos del terreno.
-Follaje: Bosques, selva, selva tropical, árboles de pino, robles, arbustos, hierba, musgo, hiedra, plantas trepadoras, árboles de sauce, olivos, baobabs, palmeras, pinos piñoneros (dibujé un montón de estos), raíces.
-Hechos por el hombre: pueblos a distancia, edificios, tejados de las casas, puentes, castillos, torres, postes de luz, caminos, calles, muros, ruinas, campamentos.
-Vehiculos: Barcos, coches, trenes, dirigibles, aviones, MechWarriors, naves espaciales, At-Ats.
-Objetos que están muy cerca de la cámara
Ejemplo: personas personajes, criaturas, monstruos, multitudes, ejércitos. Los personajes son útiles para tener para proporciones.
-fenómenos naturales: una tormenta, una tormenta de arena, una avalancha, un incendio forestal, una aurora boreal, la erupción de un volcán, una vez más: la niebla, neblina.
-fenómeno no-natural: humo, basura, luces de la ciudad, las estrellas de muerte
-Astros: la luna, el sol, los planetas, un campo de asteroides, los anillos de Saturno, una nebulosa
Consejos:
* La línea del horizonte no tiene que ser horizontal. Recuerda que estás supuestamente mirando este entorno a través de un lente de una cámara, por lo que la línea del horizonte podría estar incluso fuera del marco. Debes estar consciente de su existencia, sin embargo.
* No todos los garabatos tienen que ser algo, puedes utilizar una parte del y decir no utilizar el resto. Ni siquiera pierdas tiempo borrando, sólo trabaja en lo que es útil para tí.
* voltea la página y mira de nuevo. Gira, mira de nuevo. Puedes hacer composiciones verticales, como cuando la cámara hace un movimiento vertical. Lo hiciste al azar con tu pluma, puede que no te inspire usarla desde este ángulo, pero podría ser una cordillera si le das la vuelta, o un acantilado empinado si se gira 90 grados.
* Tus habilidades de dibujo y tus conocimientos sobre perspectiva vienen más tarde, lo que cuenta ahora es esa primera mirada a ese garabato que te reveló un entorno cool. Esta técnica, aunque siempre muestra tu conocimiento sobre la perspectiva, no tienes que ir haciendo puntos de fuga y líneas de perspectiva cada vez si no quieres o no necesitas.
* No tiene que ser exactamente real, estás creando algo nuevo para tener algo para empezar a trabajar. Sólo tienen que ser creíbles.
* Comienza a utilizar imágenes de objetos que tengas, no sólo garabatos, es posible encontrar algunos usos interesantes para artículos en tu casa y objetos encontrados. Advertencia: no empieces a acumular y amontonar basura. Mejor estrategia es simplemente fotografiar el objeto desde varios ángulos.
Las cosas que descubrirás acerca de ti mismo y tus habilidades:
-A pesar que no estás usando cualquier referencia visual al principio, te darás cuenta de que tu cerebro capta más cosas de las que parece y que tu biblioteca visual es en realidad más vasta de lo que piensas. Dicho esto, no se te ocurra dejar de capturar imágenes de referencia con su cámara o tu buscador o Pinterest. Cuidado con Pinterest, puede ser adictivo.
-Los Próximos días te volverás más observador de tu entorno, de la iluminación, del color, de la composición, de lo que sucede a ese árbol que te gusta en un momento determinado del día. Verás formas útiles en todas partes: el musgo en los árboles, los escombros en un sitio de construcción, en pintura derramada, la forma que deja la vinagreta en el plato al terminar tu almuerzo y en cualquier otro lugar. Finalmente, encontrarás un Pollock útil. Vas a grabar cosas de manera diferente con tu cerebro, y, con suerte, intentarás usarlas.
-Las Películas, juegos e historias que dices que te gustan, son diferentes a las que te impactan. Por ejemplo, la primera vez que probé esto, me di cuenta de que cada vez que no se me ocurría cómo juntar una línea entre dos acantilados, y decidía dibujar un puente, mi primera opción siempre era un puente colgante como el de Indiana Jones and the Temple of Doom. No es mi favorita de las tres, pero es mejor que el Reino de los Monos y Shia La Boeuf. Mi punto es, si te obligas a tirar cosas desde la parte más exterior de tu mente y por la parte no tan superior, te darás cuenta de las cosas que tienes a flor de piel inmediato. Saqué un montón de paisajes montañosos, una gran cantidad de desiertos y formaciones rocosas, pero para alguien que fue a bucear ayer, puede ser que lo único que pueden tener en la parte superior de la mente es formaciones de coral, no el paisaje de aquella película de Tarantino que tanto afirma es su favorita.
-En El mismo momento de dibujar los elementos, puede que no sepas exactamente de dónde exactamente estás tomándolos, pero no importa hasta que empiece la fase de referencia. Otros paisajes serán evidentes. Para mí, algunos de ellos eran de películas, juegos, libros y algunos eran de lugares en los que he estado, o fotografías que he visto tal vez sólo una vez. Había varias cadenas montañosas de Skyrim, Harrenhal de Juego de Tronos, el castillo de Drácula, de Castlevania, no de Rumania, la Roca de El Rey León, Mordor del Señor de los Anillos, las montañas de Perú de The Emperor’s New Groove, las verdaderas montañas de Perú, El Valle de Antón, las cuevas subacuáticas en la península de Yucatán en México, paisajes montañosos de Islandia, La parte rocosa de la Isla Iguana, el Gran Cañón, las gargantas de Petra, esas llanuras en Coclé que tienen un Corotú de vez en cuando, Huangshan en China, Taormina en Sicilia, Bambito, y no he estado en la mayoría de esos lugares, la mayoría de las veces es un documental o una imagen que vi en la web, la mayoría de las veces ni siquiera es real, como una escena en un videojuego. Esto es lo que los artistas conceptuales llaman una “Biblioteca Visual”. Es esta biblioteca dentro de tu cabeza de cómo algo debe verse: animales, objetos, lugares, todo lo figurativo. Vas a alimentar y darle forma mientras practicas esto.
-Encontrarás un uso constructivo de Pinterest. No te vuelvas loco con el mismo, encuentra lo que te gusta y cuando comienzas a buscar la referencia, ya sabes, porque lo has dibujado, porque medio que vino de alguna parte.
-Finalmente encontrarás un uso para esto:
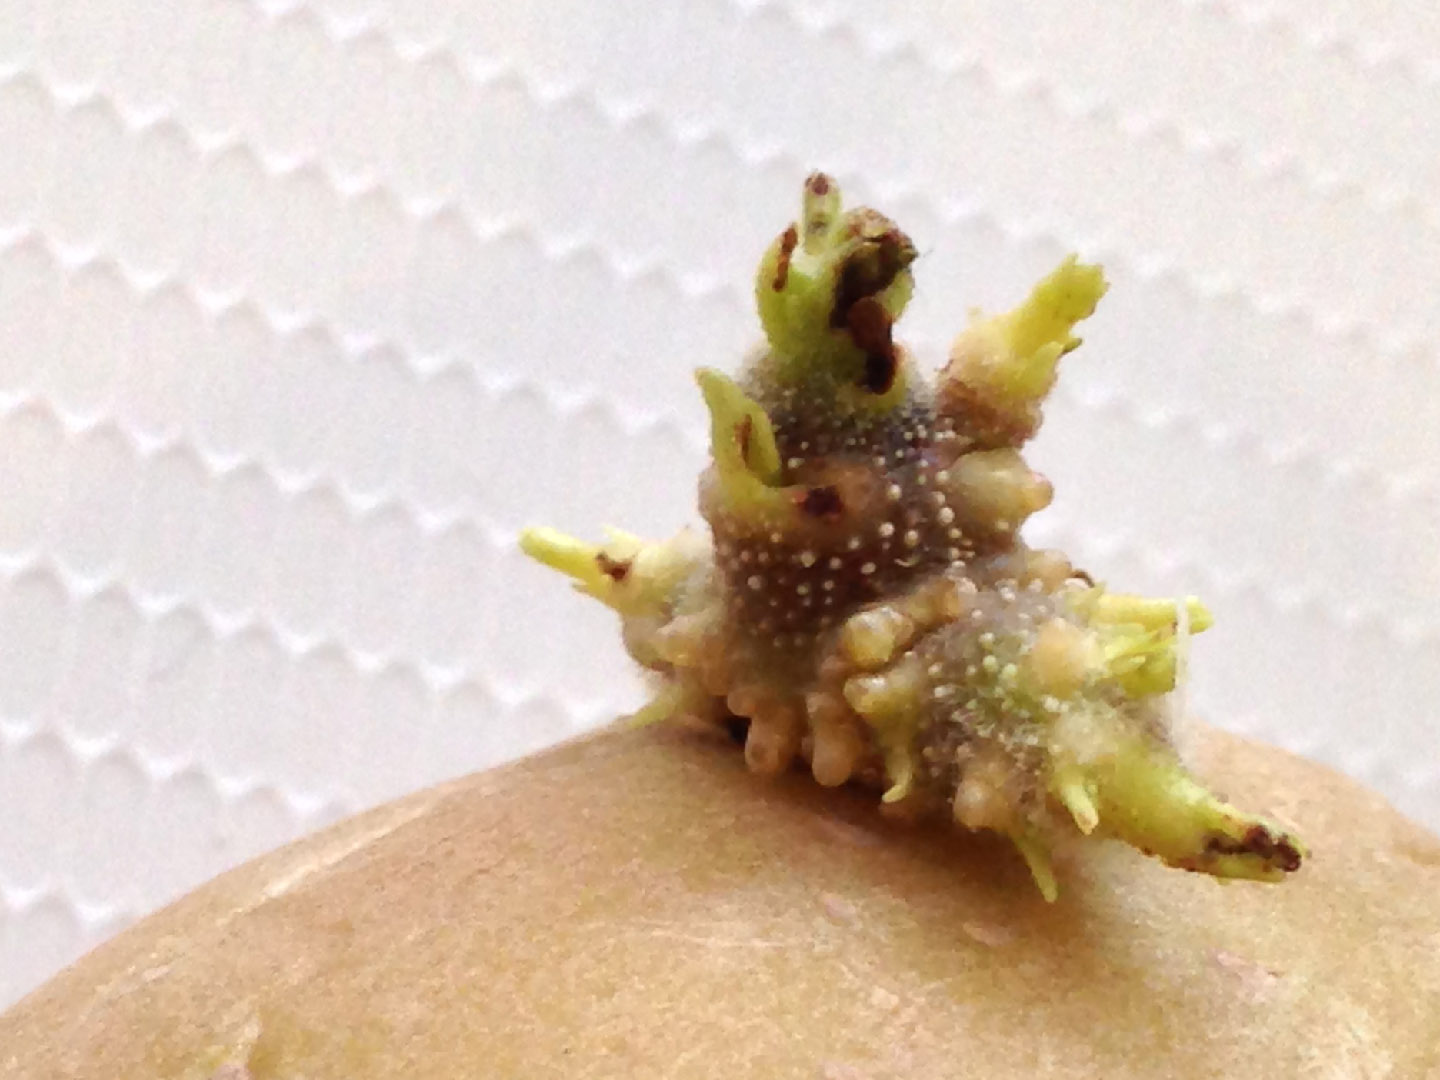
Paisaje de He-Man en potencia.
Después, vamos a añadir un poco de color y a continuación, buscaremos referencia. Por favor, hazlo en este orden, de lo contrario, pasarás toda la vida en busca de imágenes que nunca uses.
A continuación, te voy a mostrar cómo colorear rápidamente tu toma de una manera en la que no te harás viejo buscando una paleta de colores perfecta. He aquí una pista: es el mismo proceso.
Te dejo por ahora, con esta cita:
“Vi el ángel en el mármol y tallé hasta que lo puse en libertad.” -Michelangelo Buonarroti
Tags: 2D, 2D animated films, 3D animated films, 3D animation, doodling, drawing, environment design, exteriors, imagination, interiors, landscape design, observation, perceptual shift, scribbling, set design, sketch, software, thumbnailing, thumbnails, visual development, visual library

Comment